If you have part(s) that fail to mesh in an
assembly model, the part icon in the Simulation Parts list will be indicated by
a red hashed icon, as shown in the image below.
But with the latest releases of SOLIDWORKS Simulation (2011 and above),
you can fix this issue by right-clicking the part and choosing to Create Mesh
for that part alone.

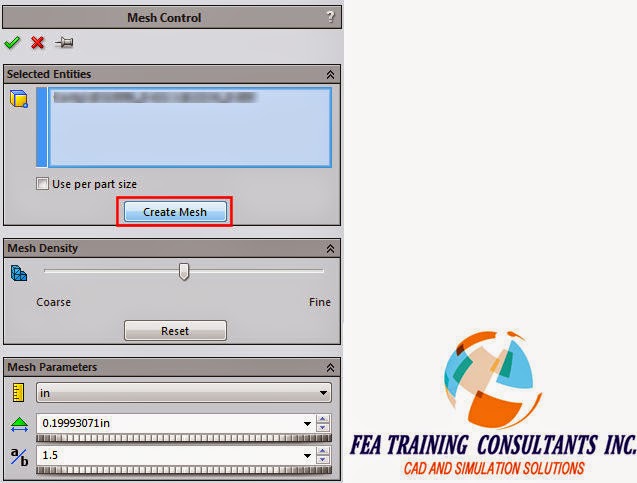
This selection will take you into the Mesh Control dialog, see image below, where you can adjust settings for the mesh size if you want, but simply clicking the Create Mesh button here will re-mesh only that part but still in the context of the assembly.
You are reminded of this fact by a pop-up telling you what is happening, see image below. (1) It creates a mesh control in the tree, and regardless of the mesher previously used, it will mesh the failed part using the Curvature based mesher.
(2) It will also automatically create Contact Sets using faces that are touching neighboring parts. Most likely the reason why the part failed to mesh in the first place was that the differences in part sizes prevented it from maintaining a compatible mesh. If there was interference between parts, another reason for parts failing to mesh, then you need to manually define the Contact Set to appropriately define their interaction

When all parts have successfully meshed,
the top level Part icon will have a check indicating that everything is meshed,
see image below.

No comments:
Post a Comment