Aligning Drawing
When
drawings are created in SolidWorks a lot of time is spent in formatting the
drawing. SolidWorks offers many tools to
help the user achieve the desired drawing format. One such tool is the use of Alignment.
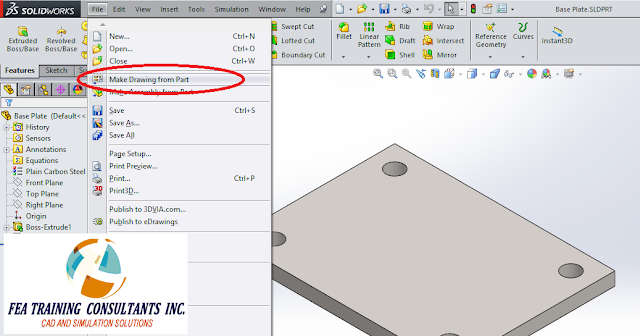
Consider a
plate modeled in SolidWorks as shown below:
To create a
drawing from this model we go to File> Make Drawing from Part.
A
blank drawing page will appear and the task pane will give you the option of
selecting one of many standard drawing views.
In this case the Top view will be selected
Click and
drag the selected view onto the page.
Once the view is inserted into the page you have the option to modify
the view scale which can be done in the Drawing View property box.
A drawing
view may be copied by selecting the drawing view, using keyboard shortcut
Ctrl+C to copy and Ctrl+V to paste a second copy of the drawing. Note that the two drawings move independently
from one another and are not linked.
In order to
align the two drawing views, select both views, right click and select
Alignment from the quick menu.
Alignment
comes with multiple options. Alignment
may be applied to the horizontal or the vertical. Alignment by the Origin will align the origin
from one view to the other view.
Alignment by the Center will automatically alignment both drawings about
the center. This distinguishing feature is useful when
aligning different drawing, detail views etc.
Once you
make your selection on the type of alignment, the mouse cursor will change
allowing you to select one of the drawing views. Your choice of selection will make the
drawing view the parent and the other, the child.
Now your
drawing views are aligned and the formatting is improved. Please note that at any point you have the
option to break the alignment by selecting the view, right click > Alignment
> Break Alignment. That will return
the drawing views to a free state.


No comments:
Post a Comment